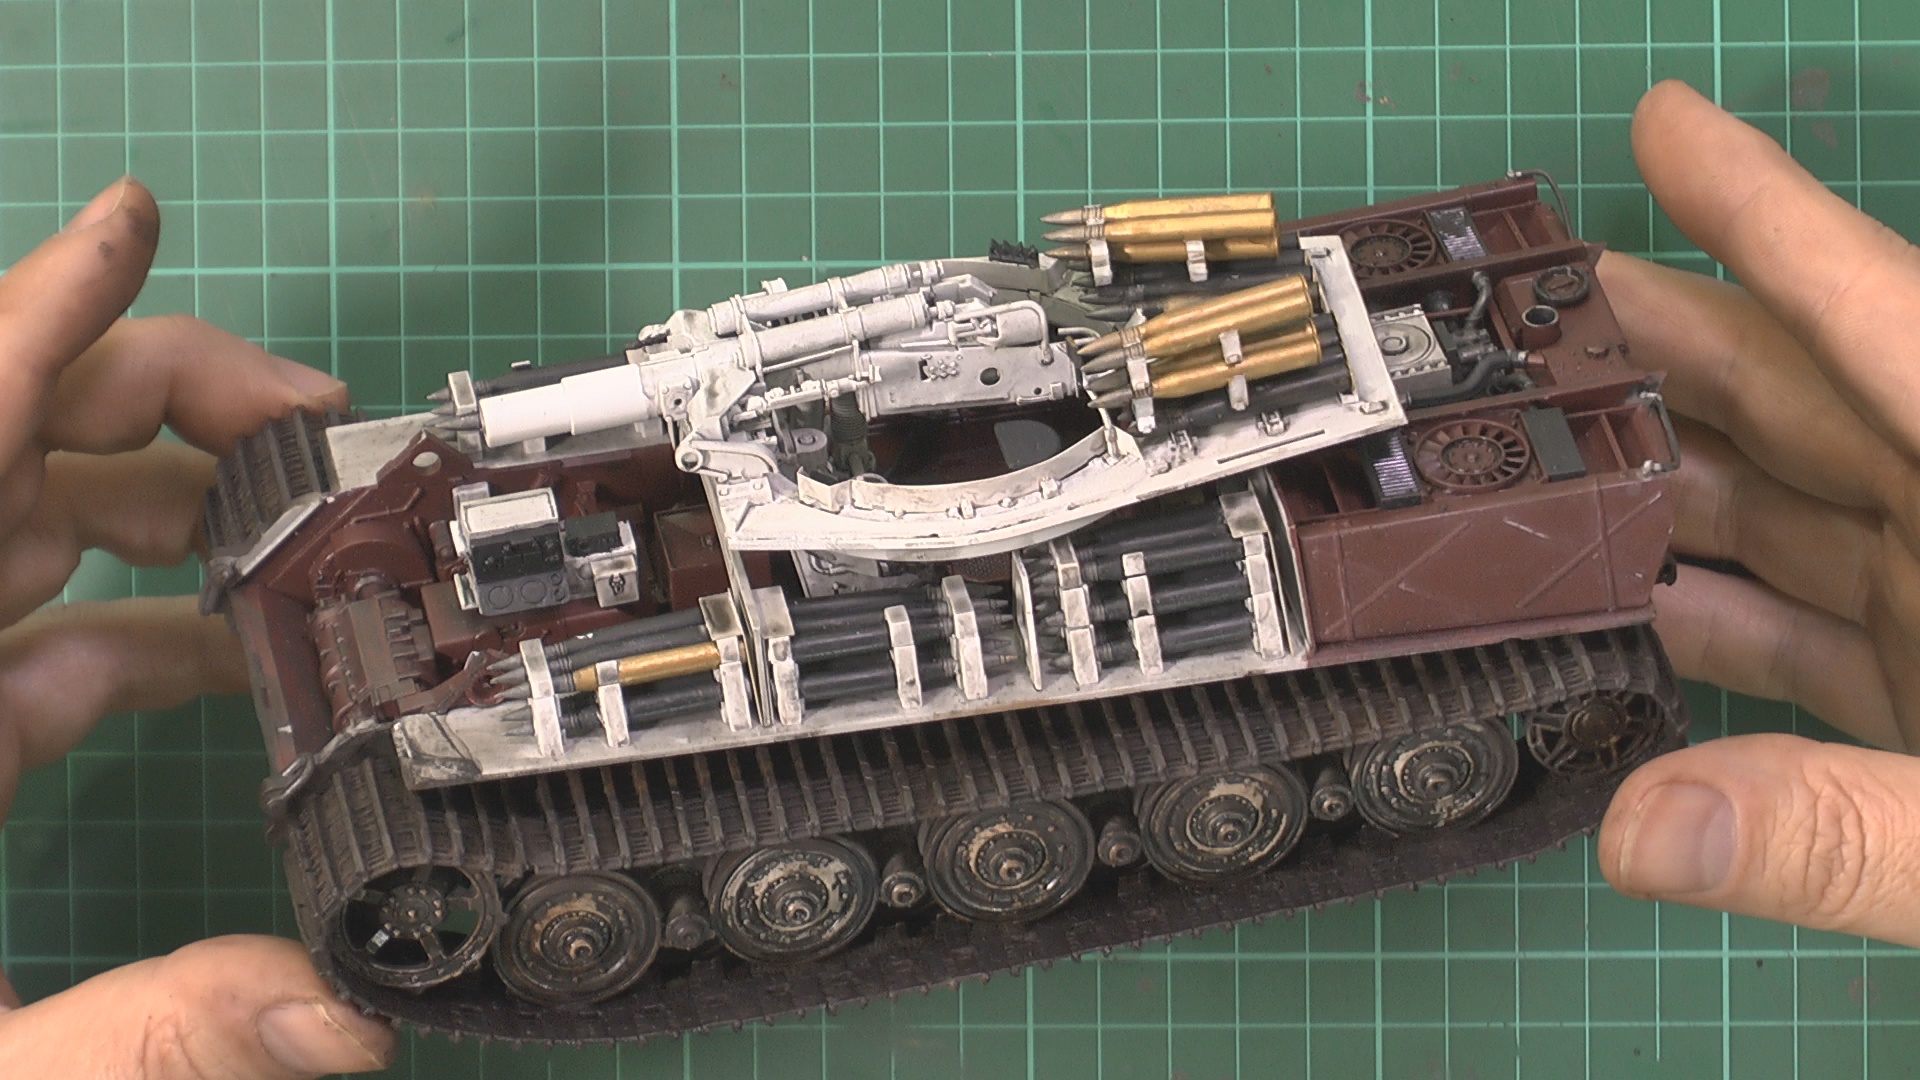
King Tiger
Scale: 1/35
Manufacturer: Takom
Parts used: Out of The Box
Main paints used: Vallejo, Tamiya
In Part One, We look at the build ahead and start work deep in the lower hull.
00:00 Intro into the build
01:30 Start work in the interior detail
In part Two, we carry on the lower hull construction and then move over to the spray booth to get the Red and White Base colors down.
00:00 Finishing off the final construction detail of the lower hull.
15:15 Into the spray booth and put doe the off white, custom mix of Tamiya XF-2 and Tamiya XF-57 Buff 9 (Approx 1/10)
20:00 Mask up the off white and put down the Red primer RAL8012 Vallejo 065 primer
26:30 We unmask and see what we've got.
In Part Three, we start on the weathering with the engine and then the lower hull.
00:00 Painting the engine with Dark Iron Mr Metal color 214
05:00 Weathering the engine (Buffing)
10:45 Building and fitting cooling system
15:52 Weathering the lower hull using 502 oils
24:12 Second coat of oils building them up slowly
In part Four, we install the engine and add all the cooling system.
00:00 Installing the engine
10:00 adding the hoses and cooling system
In part Five, we finish off weathering the lower hull and install all the shell racks before starting work on the upper hull.
00:00 Building the shell wracks and painting the shells
05:50 Using oils to weather in the weapon racks and shells and further weathering in the lower hull.
14:30 Starting work on the upper hull and install the engine covers and adding the PE grills.
In part Six, we work on the upper hull not without a few mistakes from myself that needed to be fixed.
00:00 Installing the upper hull armour.
04:15 Fix a missed place part of the armour.
07:00 Removing ejector pin marks
15:15 Into the spray booth to paint the Upper hull.
In part Seven, we finish of the upper part of the lower hull and start work on the turret.
00:00 Oil wash and blend the Upper lower turret.
13:22 Add the rear plate and exhausts etc.
19:00 Opening up the turret side locating holes
23:20 Working on the turret roof.
In part Eight, we work on the lower turret area.
00:00 Working on the turret drive motor
10:30 Building the Lower turret
In part Nine, We paint and weather the workings of the lower turret and build the main gun.
00:00 Airbrushing the Int Turret
05:15 Hand painting the details
16:20 Oil wash the int lower and upper turret
24:25 Build and test fit the main gun
In Part Ten, we look at the Zimmerit On the King Tiger and the options before adding it to our King Tiger
In part Eleven, we Prim, pre-shade, work on the tracks and get them ready for weathering
00:00 Priming and pre-shading
14:40 Build the King Tigers Kit tracks
20:25 Painting the Tracks with Tamiya XF-84 Dark Iron
25:40 Installing the tracks and touching in.
In part Twelve, we weather the lower hull and running gear using the Flory models weathering wash
00:00 Airbrushing on the wash, FMW001 Black, FMS002 Dark Dirt, FMS004 Brown
20:00 Mixing Vallejo Acrylic resin matt coat with Black wash and airbrushing it on
26:00 Using plain cold tap water to weather and chip through the wash to give a great weathered look to our King Tiger
38:15 Using the same technique to do the tracks
In part Thirteen, we carry on with the weathering of the lower hull with washes and then pigments for the wet mud look
00:00 Making up the wet mud with Wash, PVA glue and Pigments and applying
22:40 Washing back the mud with cold water
28:00 Dry Brushing dark iron onto the tracks and edges
32:00 Adding a Flatt coat to seal in the pigments and washes
34:45 Un-masking
In Part Fourteen, we work on the painting and weathering of the upper hull.
00:00 Airbrushing on the White winter camo with a Mix of Tamiya XF-2 and a few drops of Buff.
07:45 Brushing on Flory Models Dark Dirt Wash FMW002
13:33 Airbrushing on a coat of Grime wash FMW008
20:50 Adding more chipping to the wheels
26:50 Rubbing back the washes
In part Fifteen, we add more weathering with a detailed wash of thinned oils and the with neat oils and blend in.
00:00 Fine detailed wash the thinned oils
18:30 Metal effect to the tow cables with Dark Iron buffing paints
26:00 Blending and adding more weathering with Neat oils
In the final part, we add some heavy weathering with A thick pigment wash and bring it all together for the final reveal
00:00 Add the final wash made from light sand and medium mud pigments.
13:20 Adding final dry pigments
16:30 Gluing the turret together
25:30 Final thoughts about the kit and build and the reveal.


